ASRock
 Menu Menu
We use cookies to offer you a more personalized and smoother experience.
By visiting this website, you agree to our use of cookies. If you prefer not to accept cookies or require more information, please visit our Privacy Policy.
Necessary cookies
These cookies are essential for the proper functioning of the website and cannot be turned off.
Analytics cookies
These cookies help us understand how visitors use our website.
Marketing cookies
These cookies are used to track visitors and display relevant advertisements.
Social media cookies
These cookies allow you to share pages and content on social media.
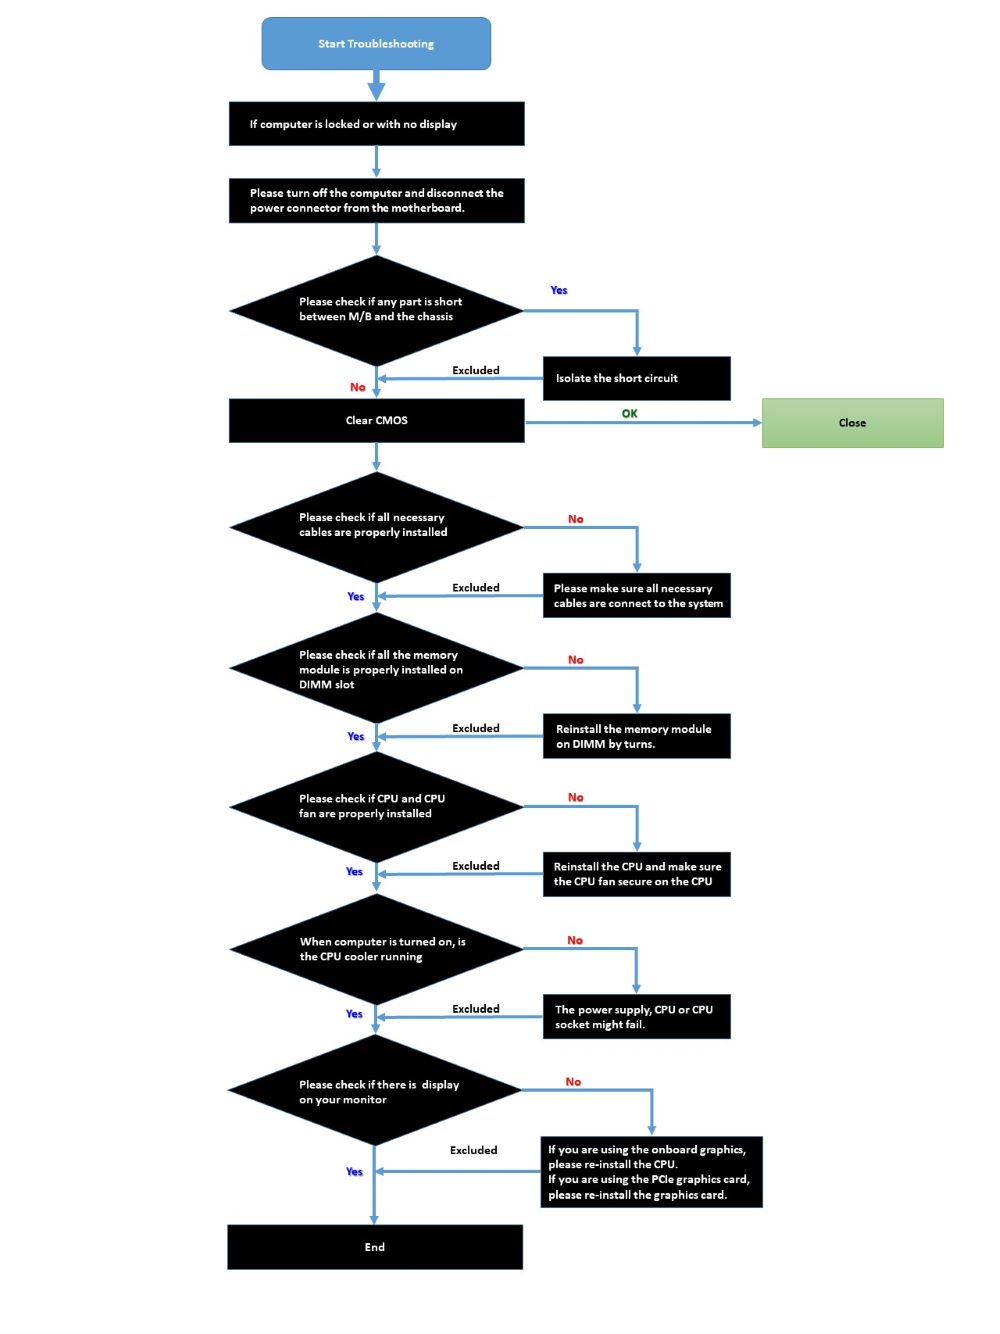
| Code | Description |
| FF, 00 - 19 D0 - D3 | Please check if the CPU is installed correctly and then clear the CMOS. |
| 31 - 3B 51 - 55 | Problem related to CPU and memory. Please clear the CMOS. Re-install the CPU and memory. |
| D4 - D5 | PCI resource allocation error. Out of Resources. |
| D6 92 - 97 | The graphics card or iGPU could not be recognized. Please clear CMOS and try re-installing the graphics card. If the problem still exists, please try installing the graphics card in other slots or try other graphics cards. |
| D7 | The keyboard and mouse could not be recognized. Please try re-installing the keyboard and mouse. |
| D8 | Invalid password |
| 9A - 9D | Problem related to USB devices. Please try removing all USB devices. |
| E8 - EB | S3 Resume failed (S3=Sleep) |
| 03 | System is entering S3 state (S3=Sleep) |
| 04 | System is entering S4 state (S4=Hibernate) |
| 05 | System is entering S5 state (S5=Soft power off) |
| 30 | System is waking up from S3 state (S3=Sleep) |
| 40 | System is waking up from S4 state (S4=Hibernate) |
| AA | System is entering OS |
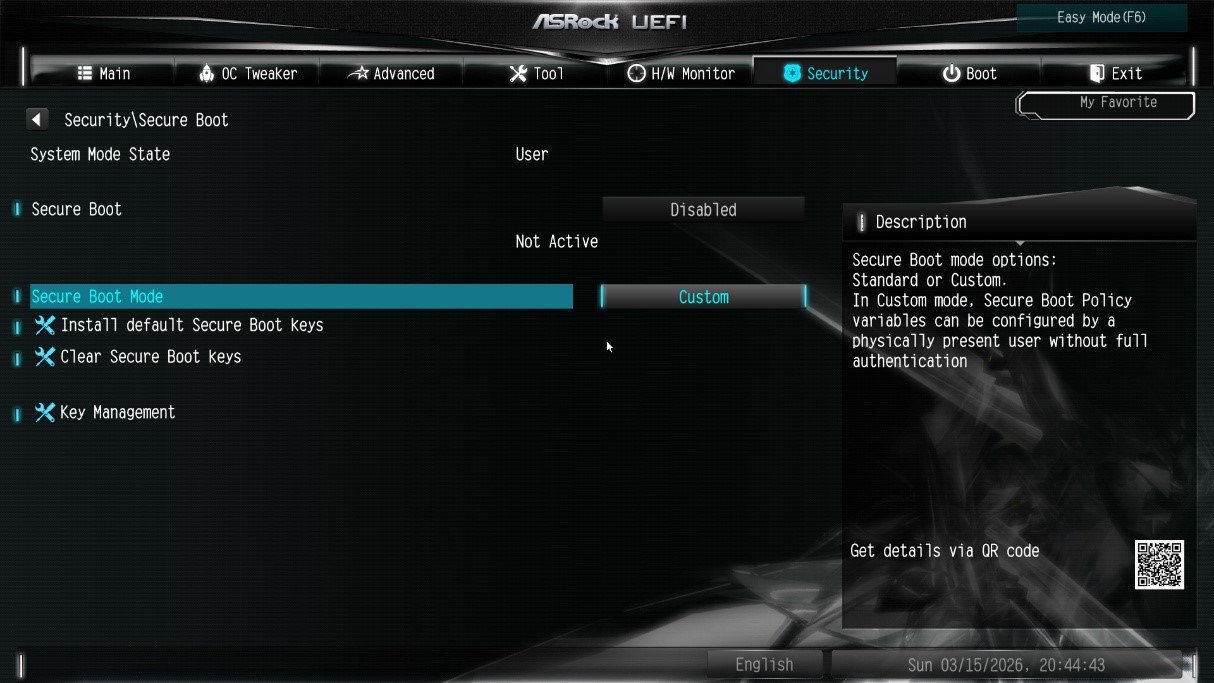
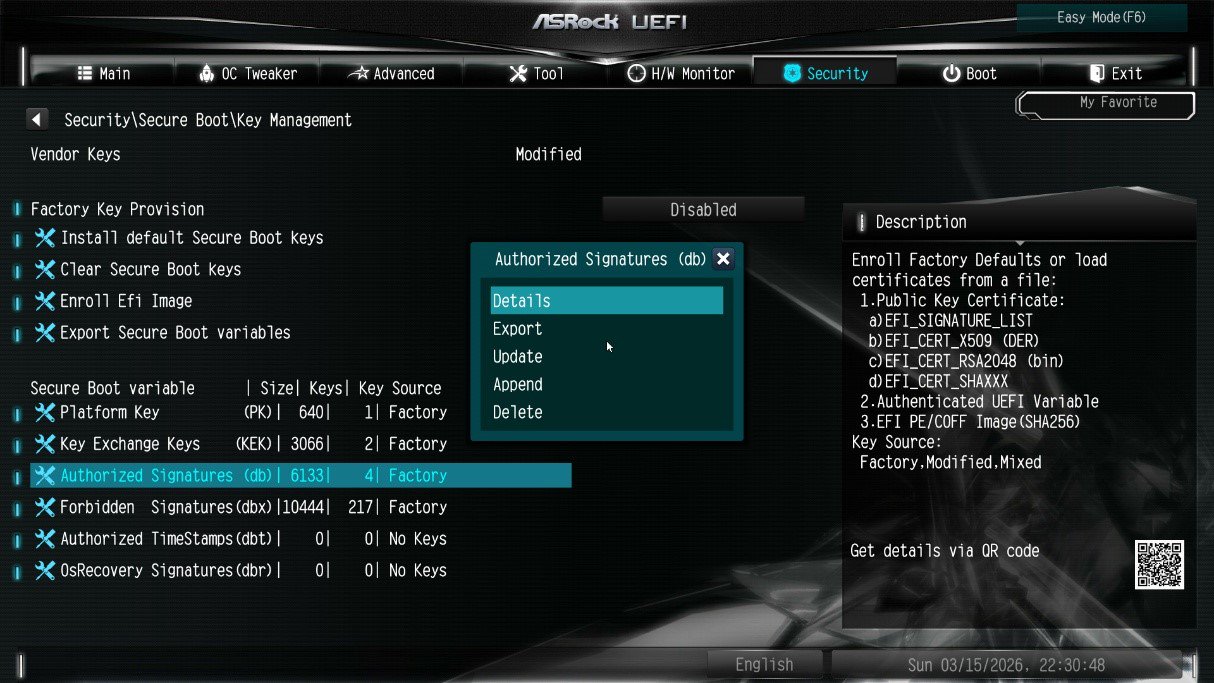
![Select Clear Secure Boot Keys, then choose [Yes].](/support/faq/190-2.jpg)

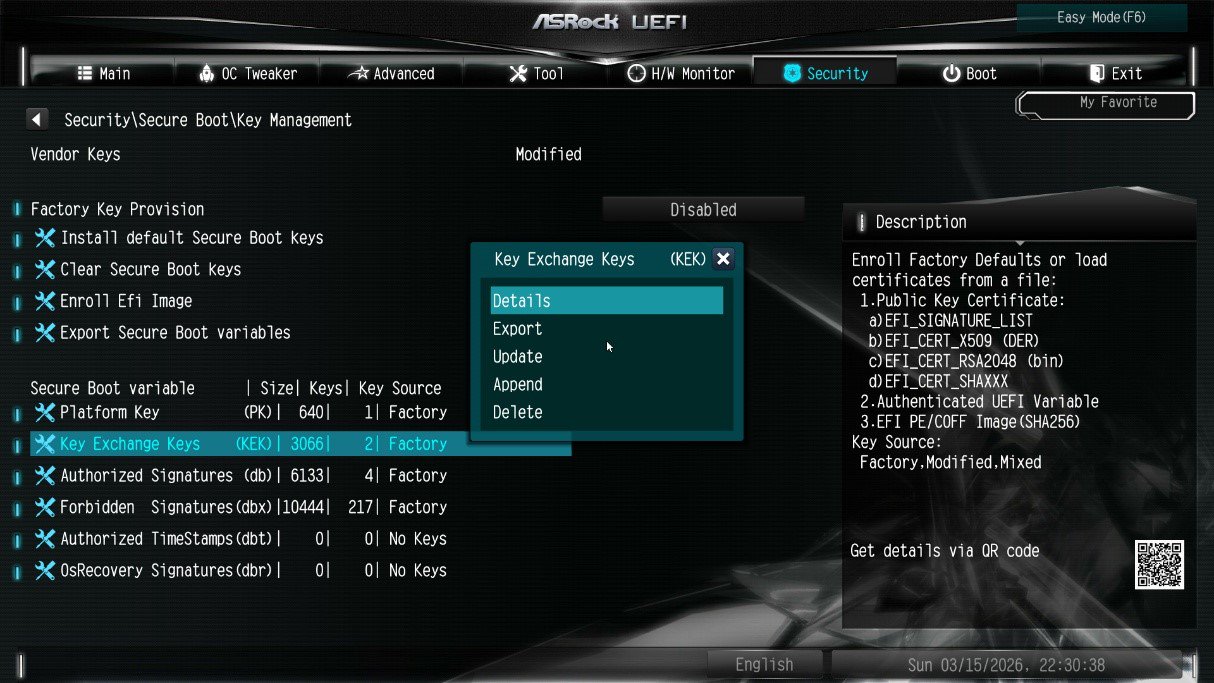
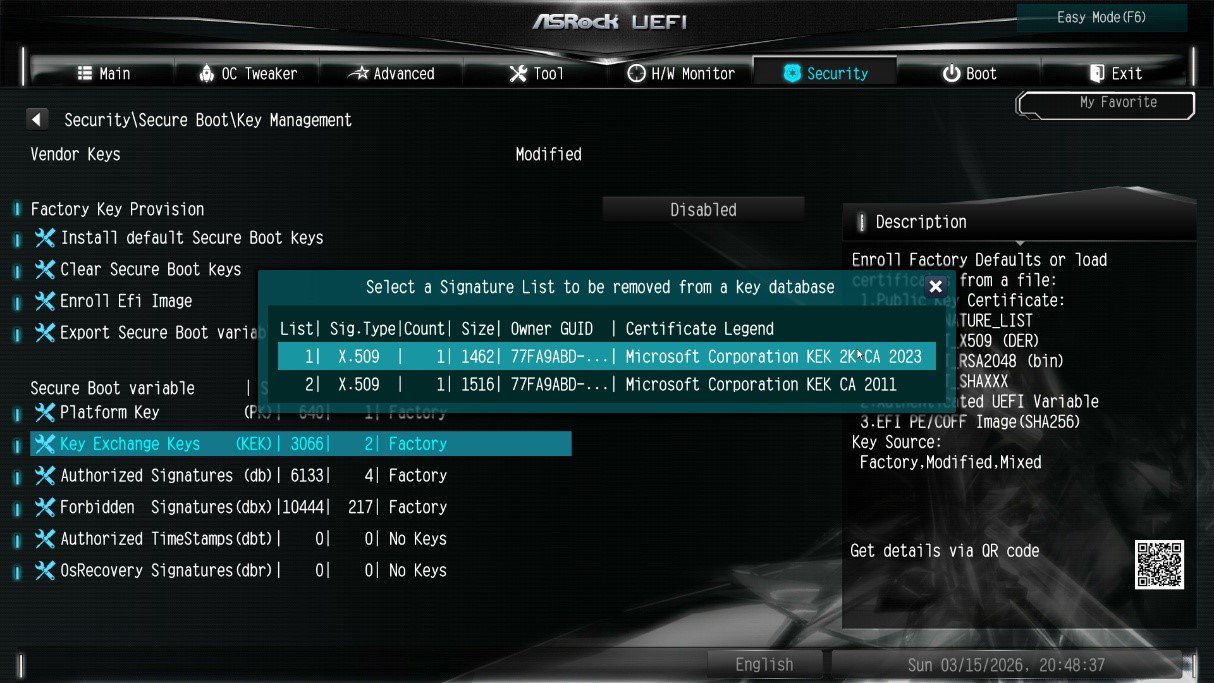
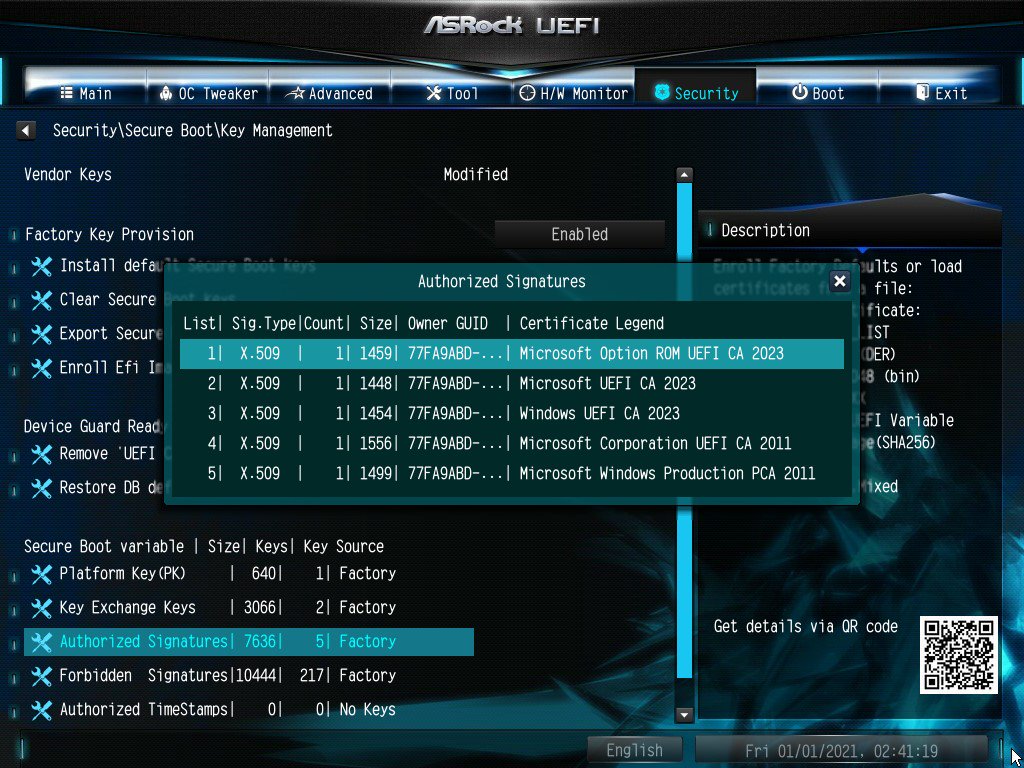
![After clearing the keys, select Install Default Secure Boot Keys, then choose [Yes].](/support/faq/190-4.jpg)


| A770 PGD | A770 CL | A750 CLD | A380 CLI | A770 LE | |
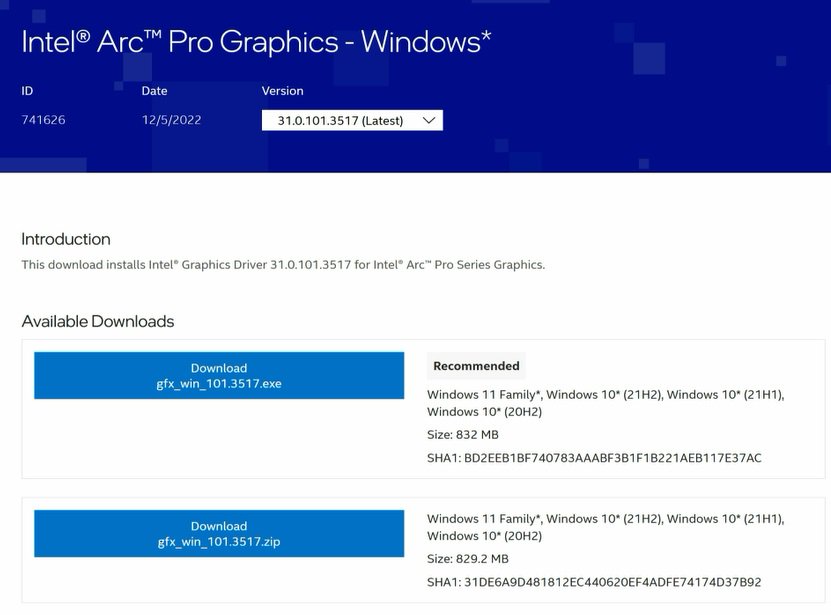
| Intel graphics card driver | Required | Required | Required | Required | Required |
| Update the graphics card FW | Required | No need | Required | No need | No need |
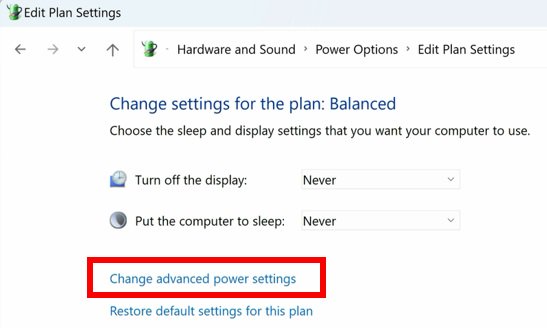
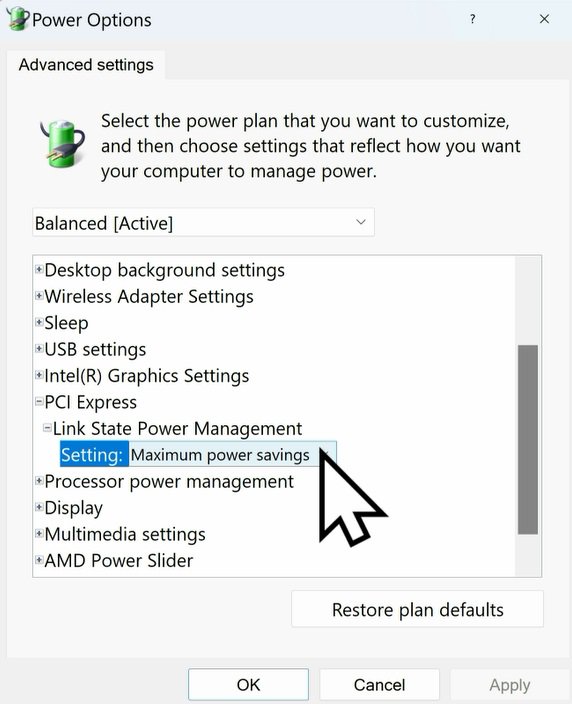
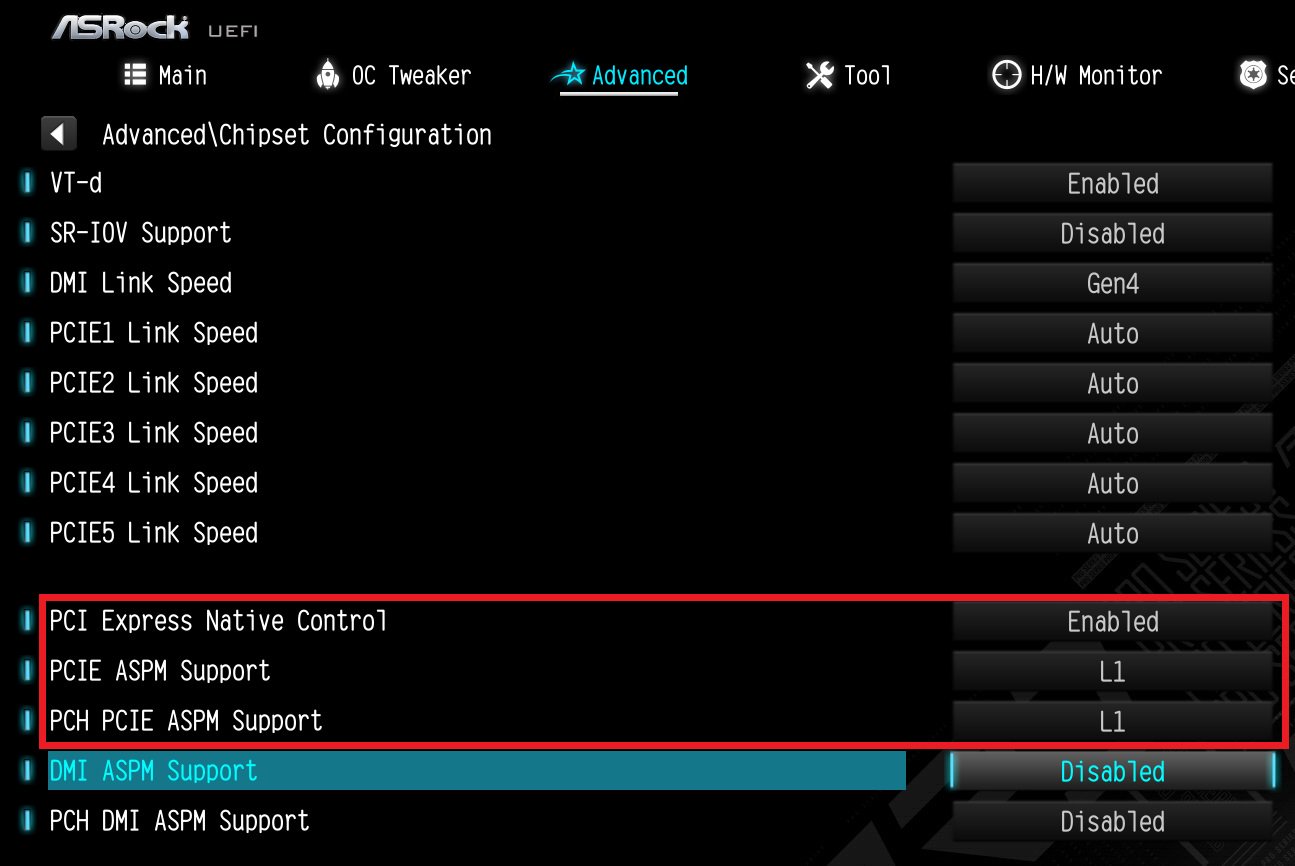
| Set PCIe power to "Maximum power savings" | Required | Required | Required | Required | Required |
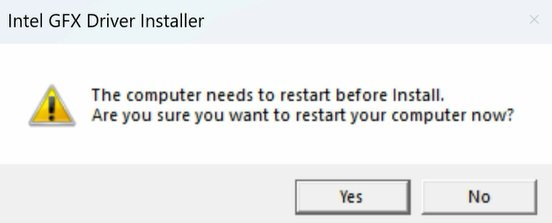
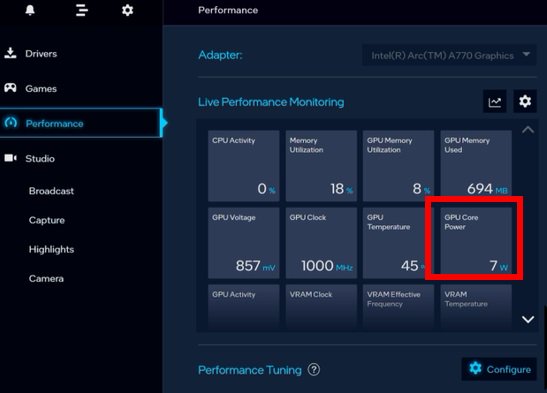
| Reinstall the graphics card driver and check the "GPU Core Power" | Required | No need | Required | No need | No need |


| Platform | 600 series | 500 series | 400 series | 300 series |
| BIOS version | Any version | Not supported | ||
| Unit: watt | Not idle | Idle (power saving) | Monitor off |
| A770 LE | ~35 | ~16 | ~1 |
| A770 PGD | ~29 | ~7 | ~1 |
| A750 CLD | ~42 | ~32 | ~11 |
| A380 CLI | ~17 | ~15 | ~6 |
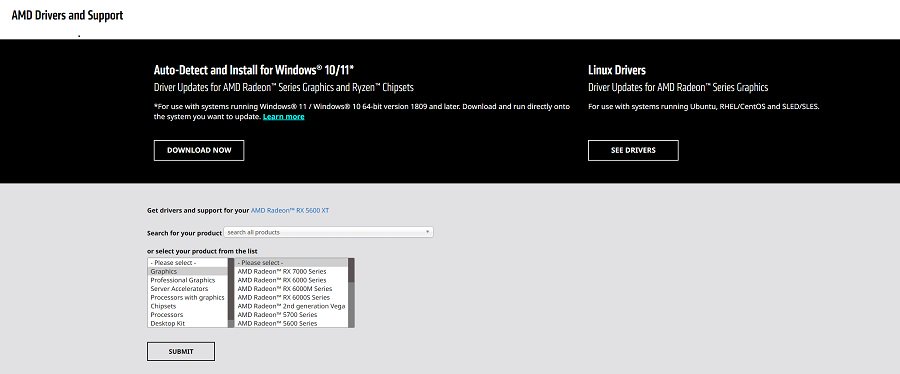
| GPU | Model | Download | |
| AMD | RX 9070 XT | RX9070XT MH 16G | Link |
| RX9070XT TC 16GO | Link | ||
| RX9070XT SL 16G | Link | ||
| RX9070XT SLD 16G | Link | ||
| RX 9070 | RX9070 SL 16GO | Link | |
| RX 9070 GRE | RX9070GRE SLD 12GO | Link | |
| RX 9060 XT | RX9060XT SL 16GO | Link | |
| RX9060XT SL 8GO | Link | ||
| RX 7900 XTX | RX7900XTX AQ 24GO | Link | |
| RX7900XTX TCW 24GO | Link | ||
| RX7900XTX TC 24GO | Link | ||
| RX7900XTX PG 24GO | Link | ||
| RX 7900 XT | RX7900XT TC 20GO | Link | |
| RX7900XT PGW 20GO | Link | ||
| RX7900XT PG 20GO | Link | ||
| RX 7900 GRE | RX7900GRE SL 16GO | Link | |
| RX 7800XT | RX7800XT PG 16GO | Link | |
| RX7800XT SL 16GO | Link | ||
| RX 7700XT | RX7700XT PG 12GO | Link | |
| RX7700XT SL 12GO | Link | ||
| RX 7600 XT | RX7600XT SL 16GO | Link | |
| RX 7600 | RX7600 PG 8GO | Link | |
| RX7600 SL 8GO | Link | ||
| RX 6950 XT | RX6950XT OCF 16G | Link | |
| RX6950XT PG 16GO | Link | ||
| RX 6900 XT | RX6900XT OCF 16G | Link | |
| RX6900XT PGD 16GO | Link | ||
| RX 6800 XT | RX6800XT TCX 16GO | Link | |
| RX6800XT PG 16GO | Link | ||
| RX6800XT PGD 16GO | Link | ||
| RX 6800 | RX6800 PGD 16GO | Link | |
| RX6800 CLP 16GO | Link | ||
| RX 6750 XT | RX6750XT PGD 12GO | Link | |
| RX 6700 XT | RX6700XT PGD 12GO | Link | |
| RX 6650 XT | RX6650XT PGD 8GO | Link | |
| RX6650XT SL 8GO | Link | ||
| RX 6600 XT | RX6600XT PGD 8GO | Link | |
| Intel | Arc™ B580 | B580 SL 12GO | Link |