Question (
Q&A-46|
183):
My system is based on 775Dual-VSTA / ALiveSATA2-GLAN / AM2V890-VSTA with Windows
® XP / Windows
® 2000 operating system. After updating to the latest BIOS, I found two issues.
1.I can't find the "HD Audio Driver and Application" link in the menu of support CD.
2.There is a yellow exclamation mark in Device Manager.
What could I do?(9/19/2006)
Answer:1.If your CD is IVD12/ IVD12b (775Dual-VSTA), AV890-10 (ALiveSATA2-GLAN) or AV31/ AV31b (AM2V890-VSTA), you will get the issue.
Please execute the "Setup.exe" file from following directory of support CD.
775Dual-VISTA-> IVD12
CD\Drivers\Audio\REALTEK\MCE_XP_2K (R1.36)\
775Dual-VISTA->IVD12b
CD\Drivers\Audio/ REALTEK\MCE_XP_2K (R1.41)\
ALiveSATA2-GLAN -> AV890-10
CD\Drivers\Audio\REALTEK\MCE_XP_2K (R1.39)\
AM2V890-VSTA -> AV31/ AV31b
CD\Drivers\Audio\REALTEK\MCE_XP_2K (R1.39)\
2:The yellow exclamation mark in Device Manager is unnecessary. It will not affect the system at all. Please follow below steps to remove it.
- Right-click "My Computer" on your desktop, and click "Properties".
- Select "Hardware", and click "Device Manager".
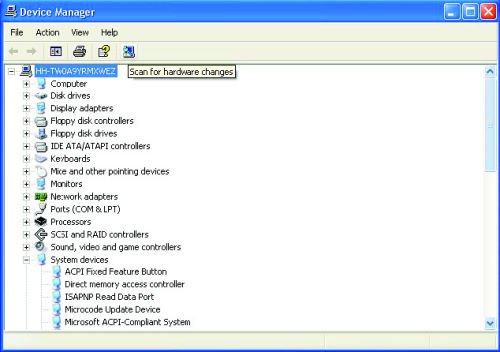
- In "Device Manager", double-click the option "System Devices". You will find "VIA® Standard PCI to PCIE Bridge" item with a yellow exclamation mark.
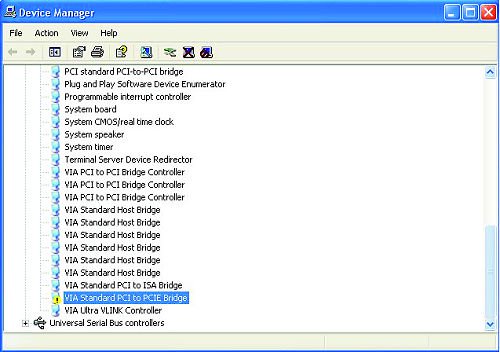
- Right-click "VIA® Standard PCI to PCIE Bridge", and select "Uninstall". Confirm your choice by clicking "OK".
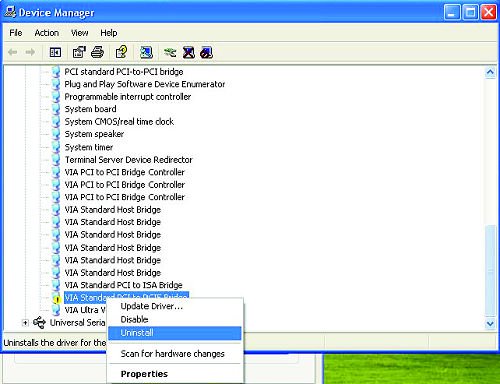
- After a few seconds, click "Scan for hardware changes" icon on the top.
 Menu
Menu