A:First, please download and update BOTH of your BIOS and Intel Rapid Storage Driver.
Z68 Extreme4:
Z68 Extreme4
Z68 Pro3:
Z68 Pro3
Z68 Pro3-M:
Z68 Pro3-M
After doing so, please follow the steps below to setup Intel Smart Response:
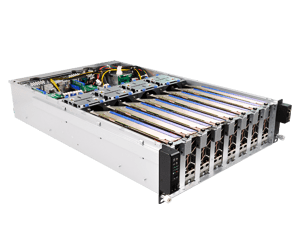
Step 1. Before booting up the system, please make sure to connect your HDD to supported SATA ports.
For Z68 Extreme4, please connect to the ports as shown below.
These ports are from Intel PCH chipset, which support Intel Smart Response Technology.
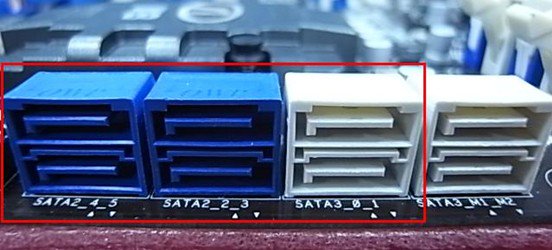
Please note that, for Z68 Pro3 or Z68 Pro3-M, all the SATA ports are supported.
※ Note:
We recommend users to connect your HDD to SATA3 ports if your HDD is SATA3 spec.
Please DO NOT connect SSD to the system at the moment.
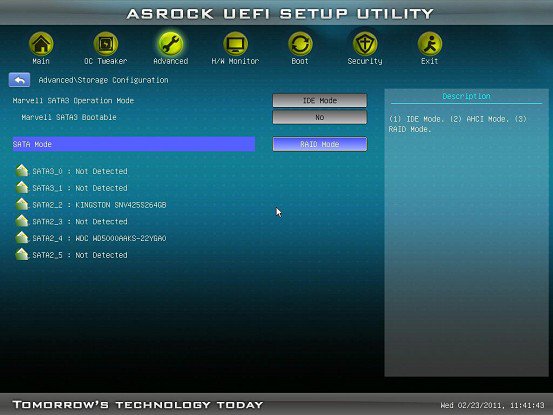
Step 2. Please press F2 or DEL to enter BIOS > Advanced > Storage Configuration.
Step 3. Please set SATA mode to [RAID Mode] as shown below
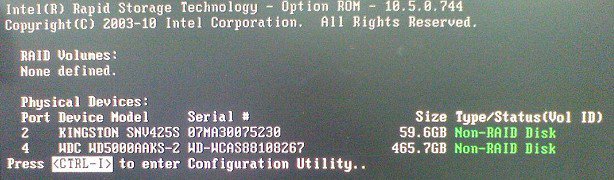
Step 4. In RAID ROM screen, HDD status should be "Non-RAID Disk"
Step 5. Please install OS in SATA HDD, after installation, please shut down your system and connect SSD to SATA ports listed above.
Step 6. Please install Intel Rapid Storage Driver (10.5.0.1027)
Step 7. After installation is completed, reboot the system and open Intel Rapid Storage Technology.
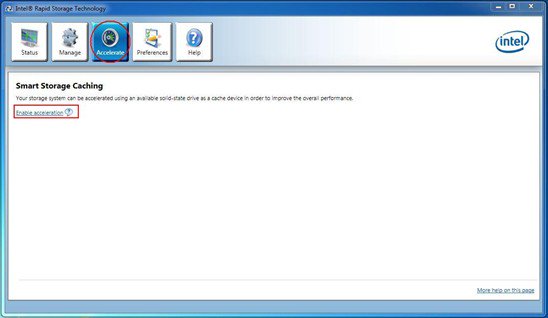
Step 8. Choose "Accelerate", and click "Enable acceleration"
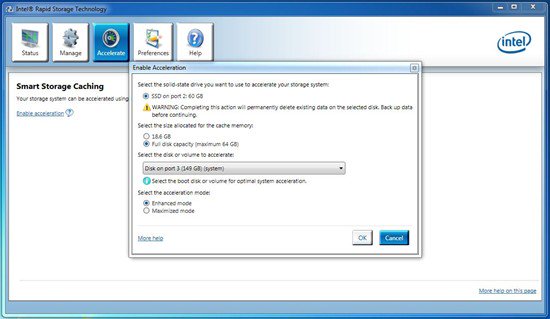
Step 9. You could change the default settings as you want it, then click "OK"
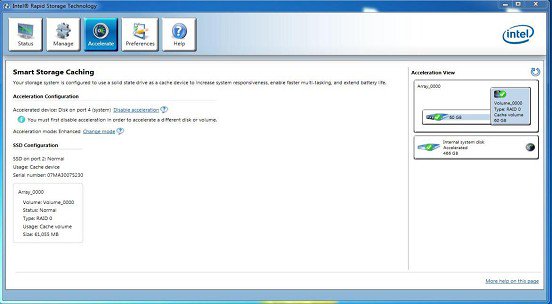
Step 10. You could see the Smart Storage Caching is enabled as shown below:
 Cardápio