ASRock: Anleitung für das BIOS-Upgrade
Instant Flash BIOS Updat e Procedures
Method 1:
- Please extract the zip file after downloading the BIOS rom file from ASRock website.
- Save the BIOS files on a FAT32 formatted USB disk.
- Press [F2] during POST to get into BIOS setup menu.
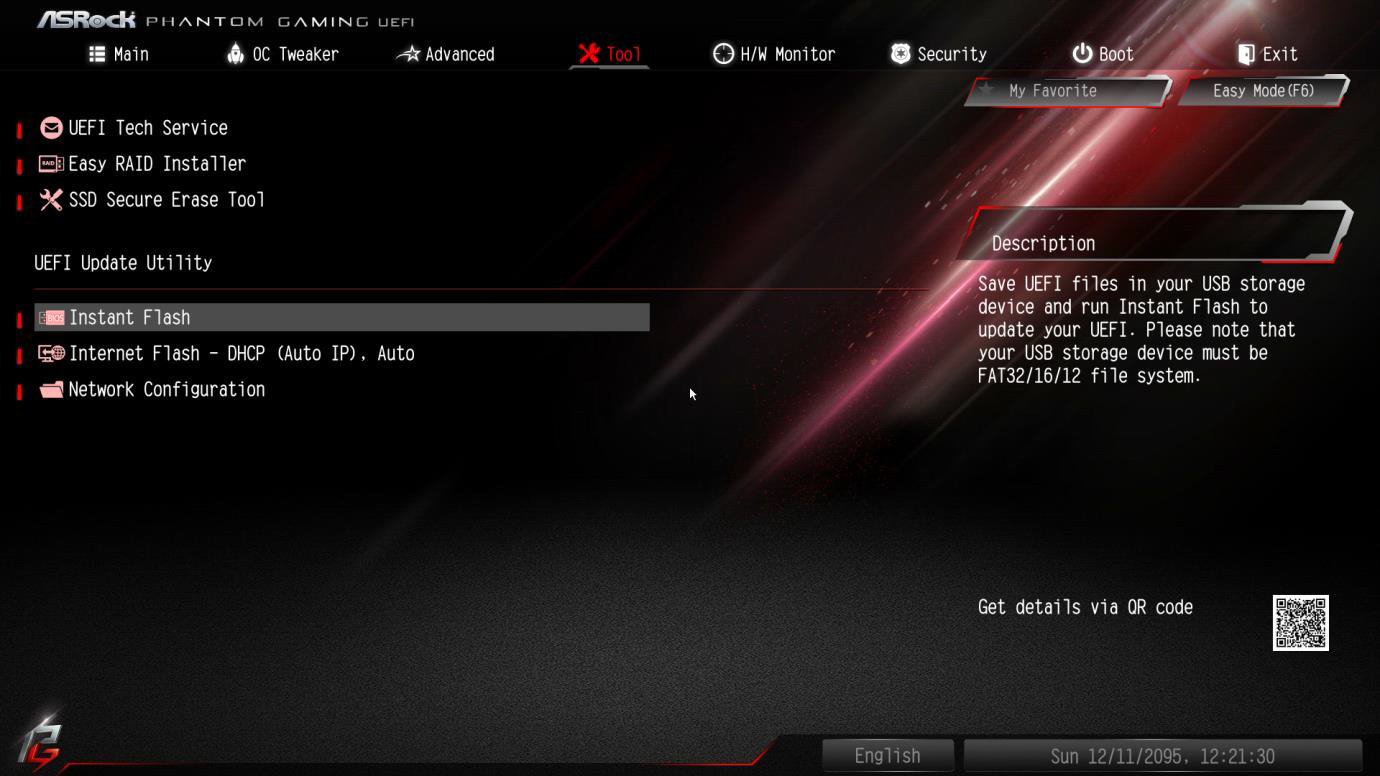
- Select the Instant Flash utility under [Tool] menu to execute it.
- ASRock Instant Flash will automatically detect all devices and only list those BIOS versions which are suitable for your motherboard.
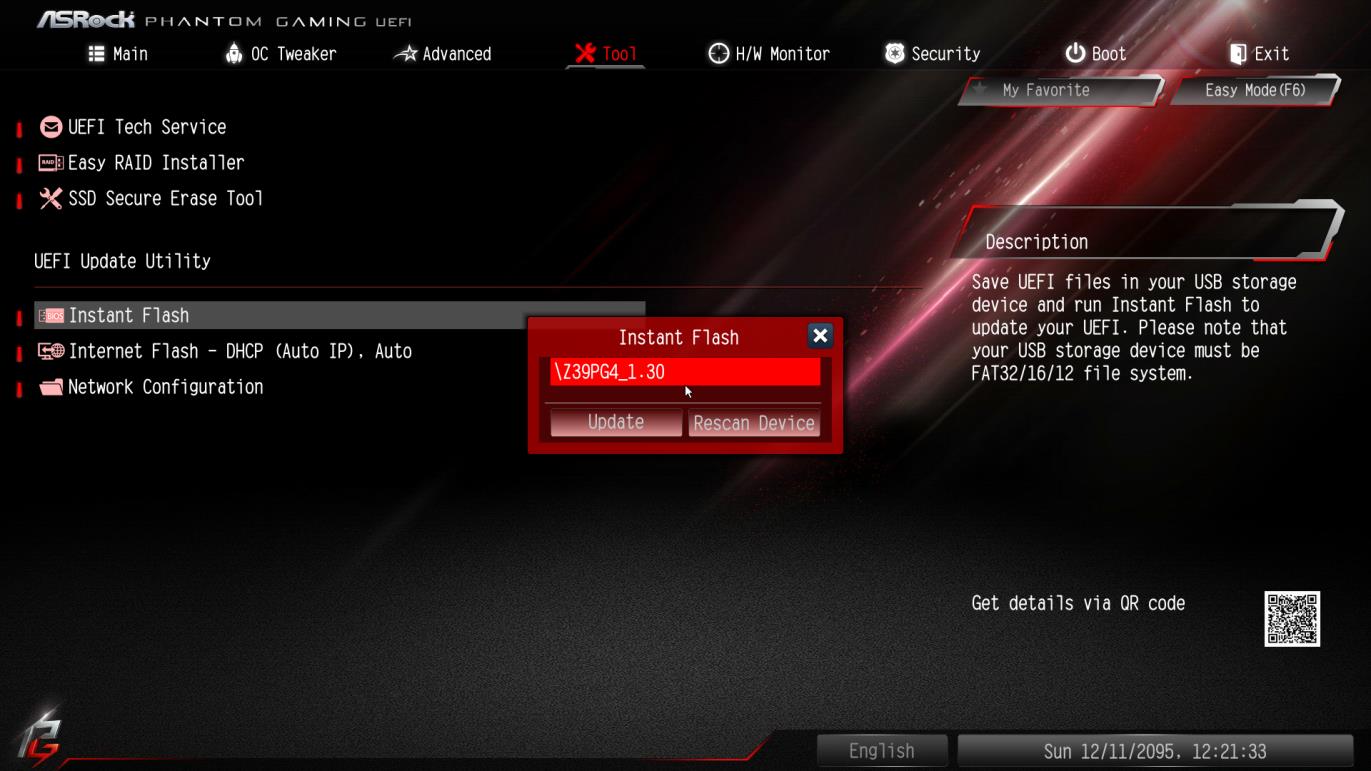
- Select the suitable BIOS version and click Yes to flash the BIOS

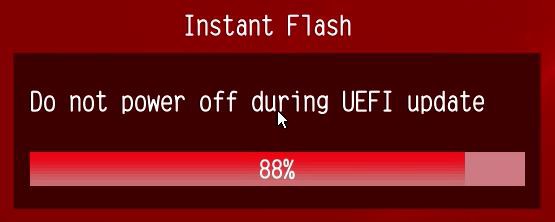
- The system will start to flash the BIOS.
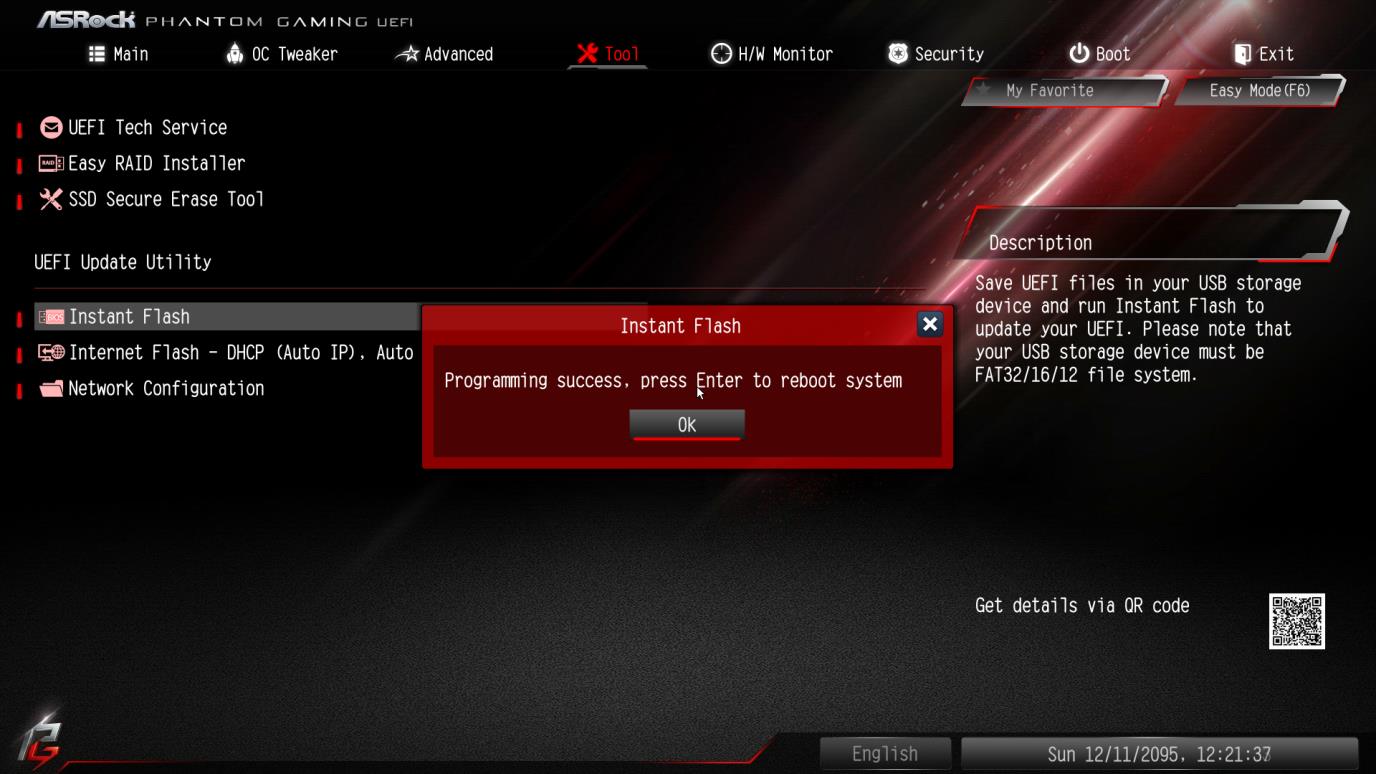
- Once the BIOS is flashed, it ll show Programing success, Press Enter to reboot system Please click OK to reboot the system.
- After the system restart s , press [F2] to enter the BIOS setup utility during boot up. In Exit menu, please select "Load Default Settings" and press [Enter] to continue. Select "Exit Saving Changes" and press [Enter] to exit the BIOS setup utility. Now, the system is booting up with new BIOS.
Anmerkung
![]() Nicht jedes Flash-Memory-Writer-Utility funktioniert mit jedem Mainboard von ASRock. Bitte verwenden Sie für das BIOS-Update das Flash-Utility, das in der jeweiligen BIOS-Datei enthalten ist. Zudem muss das BIOS-Update bei einem Mainboard von ASRock mit einem Flash-Utility von ASRock durchgeführt werden. Nicht zertifizierte Flashing-Tools für das BIOS können zu Schäden am Mainboard führen.
Nicht jedes Flash-Memory-Writer-Utility funktioniert mit jedem Mainboard von ASRock. Bitte verwenden Sie für das BIOS-Update das Flash-Utility, das in der jeweiligen BIOS-Datei enthalten ist. Zudem muss das BIOS-Update bei einem Mainboard von ASRock mit einem Flash-Utility von ASRock durchgeführt werden. Nicht zertifizierte Flashing-Tools für das BIOS können zu Schäden am Mainboard führen.
SCHALTEN SIE DEN PC NICHT AUS, wenn es beim Update-Prozess zu einem Fehler kommt, da ein defektes BIOS dazu führen kann, dass das System nicht mehr ordnungsgemäß startet. Wiederholen Sie stattdessen den Vorgang. Sollte das Problem weiterhin bestehen, spielen Sie das originale BIOS wieder ein. Sollte das Flash-Memory-Writer-Utility das Update nicht erfolgreich beenden können, startet das betroffene System womöglich nicht mehr. In solch einem Fall muss das System von Fachpersonal untersucht werden.