ASRock BIOS Upgrade Instruction
X399 Windows update SOP
- Download the BIOS package (WinZip format with .zip file extension). And close all programs.
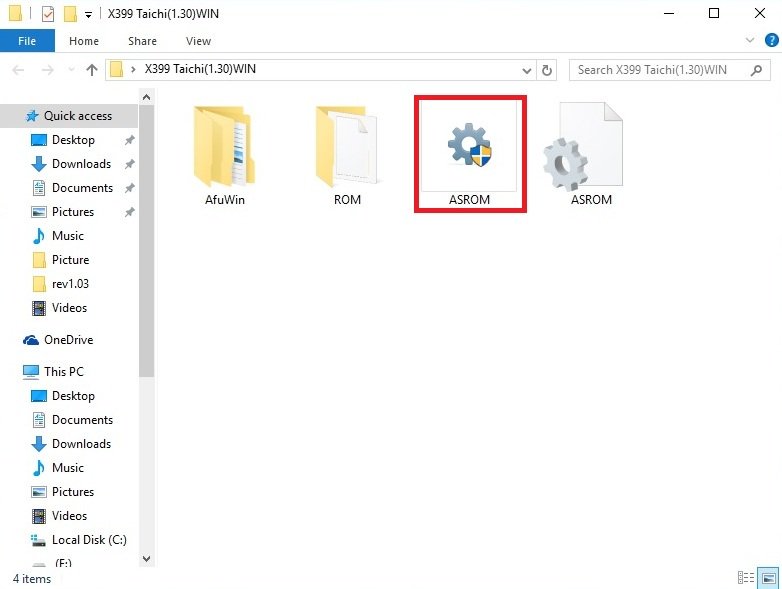
- Unzip and save all files to the same directory of any storage location accessible by the host system. And you should see ASROM.exe
- Double click to execute ASROM.exe
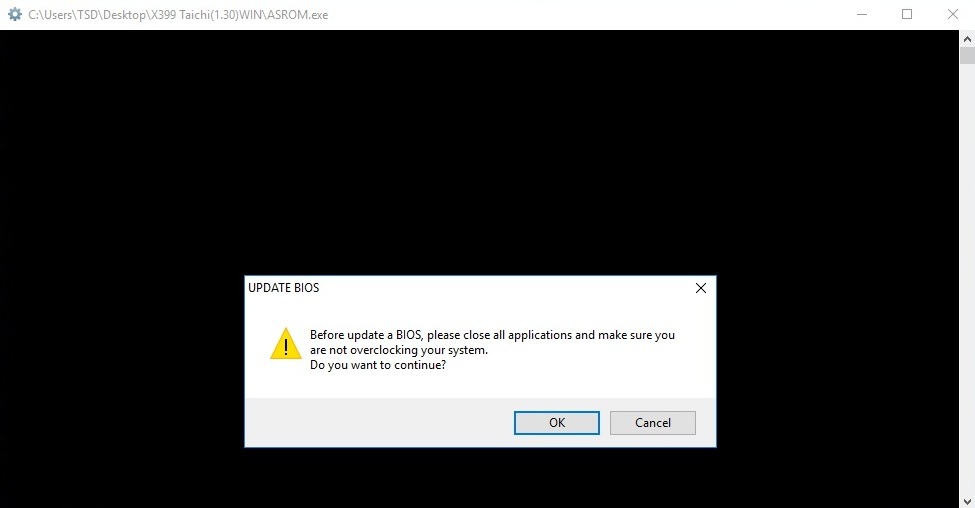
- It shows a dialog icon to remind that "Before updating BIOS, please close all applications and make sure you are not overclocking your system. Do you want to continue?" Click "OK".
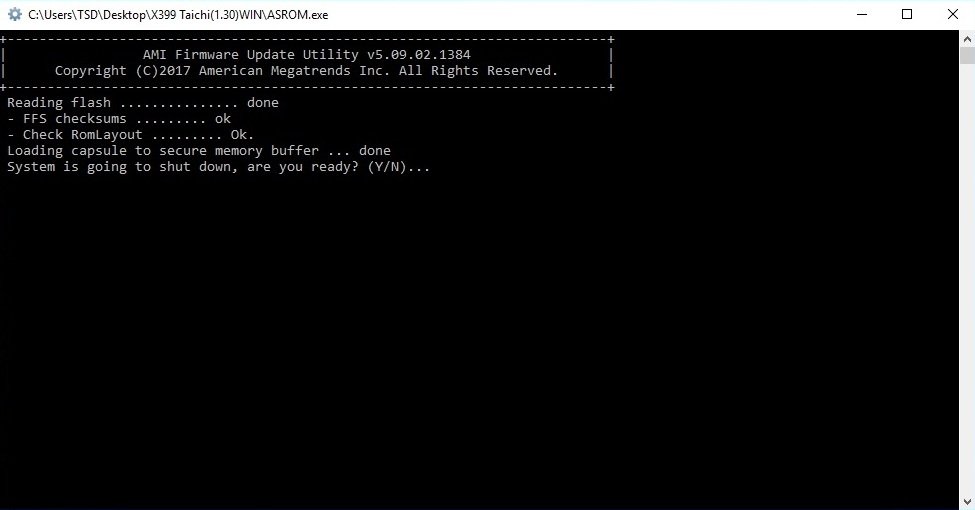
- It shows following icon to reading flash. When process finish, please press “Y” to next process.
- After rebooting, it will update BIOS automatically.
Note: DO Not power off during UEFI update.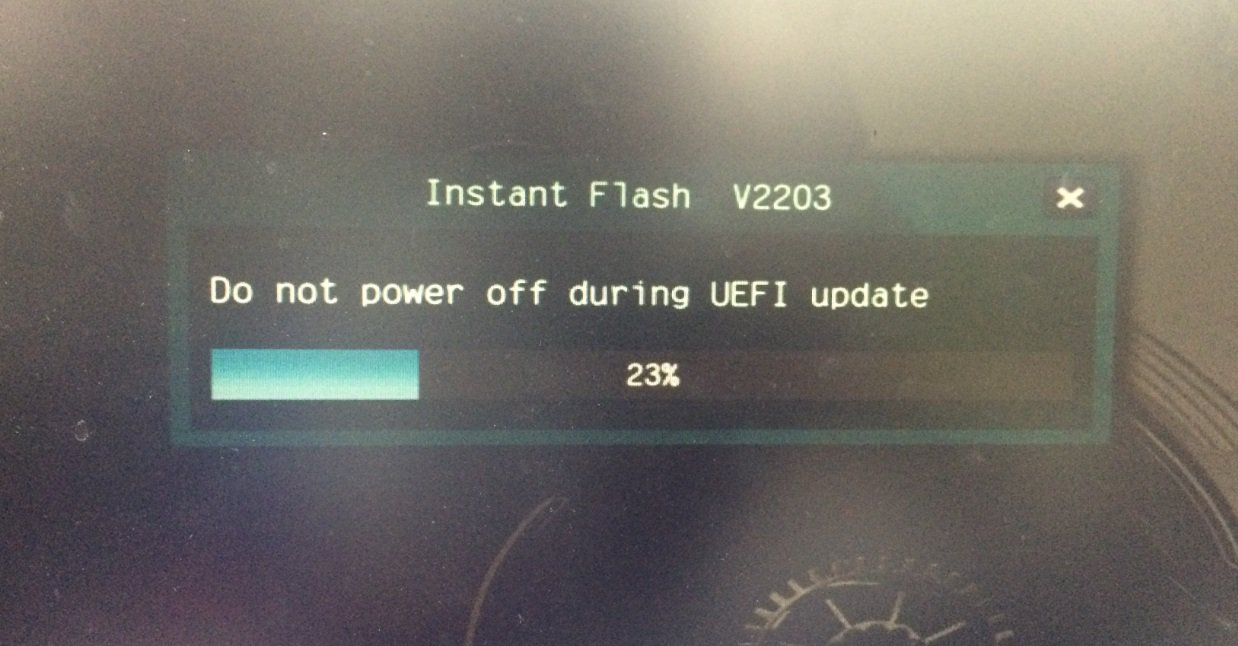
- After finishing upgrading the BIOS, it would boot up automatically. Please press [F2] to enter the BIOS setup utility during boot up. In Exit menu, please select "Load Default Settings" and press [Enter] to continue.
- Select "Exit Saving Changes" and press [Enter] to exit the BIOS setup utility.
- Now, system is booting up with new BIOS.
Notice
![]() The Flash Memory Writer utility can not suitable for all ASRock motherboards. Please use the Flash utility which is included in each BIOS file to update its BIOS. Also ASRock motherboard MUST use ASRock's Flash utility to update BIOS, those uncertified BIOS flashing tools will cause motherboard damage.
The Flash Memory Writer utility can not suitable for all ASRock motherboards. Please use the Flash utility which is included in each BIOS file to update its BIOS. Also ASRock motherboard MUST use ASRock's Flash utility to update BIOS, those uncertified BIOS flashing tools will cause motherboard damage.
If you encounter problems while updating the new BIOS, DO NOT turn off your system since this corrupt BIOS might cause your system failed to boot up. Just repeat the process, and if the problem still persists, update the original BIOS file. If the Flash Memory Writer utility was not able to successfully update a complete BIOS file, your system may not be able to boot up. If this happens, your system will need service.